BEGINNING ENCAUSTIC ART? This page & these links will guide you through the basics ... |
|
What is encaustic art? - WATCH A QUICK VIDEO
Creativity with molten wax colours might sound complex, but in practise it is achievable for almost everyone, from simple therapy & relaxation all the way to fine art. But start here if you prefer hobby art to fine art! These iron & stylus approaches are a great way to explore & learn, combining craft & art into more than just a hobby .
|
|
|
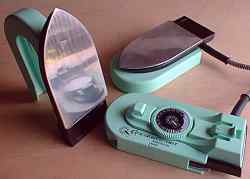
the encaustic iron
Produced to a high set of specification, this small light iron has an excellent thermostat, polished base plate, converts into a "mini hotplate" and is the ideal iron to use for encaustic art.
Can I use a travel iron? Only if it has no steam holes but does have a good stable thermostat - Both are vital to your success. |
|
|
the encaustic art wax blocks
The wax blocks are especially formulated and made to work as molten wax colours. The strong vibrant pigments are lightfast enough for this to be an art material, yet they remain safe to use, not containing any resins or dangerous pigments. They melt at around 65C and polish to a beautiful sheen. There are 48 colours, all intermixable. Easy to hold and apply and quite economic in use too. These encaustic art wax blocks are an excellent & safe product. |
|
|
the encaustic painting card
The sealed surface of this particular white card, the encaustic art card, is created & used to allow easy re-working whilst offering a good key (grip) to the wax. The wax does not penetrate the surface, so the card remains clean for a long time during creating and re-working. It is available in sizes from A6 up to A1. |
|
|
what to buy to get started
you need an iron, some wax colours, some card and a bit of guidance to get started & heading off in the direction of success. There are a couple of special offers on the online store, or you can get separate items if you prefer.
1) Get Started Set = Iron & Artset (wax, card, guide, scribing tool)
2) Get Started Plus = Iron & Artset (wax, card, guide, scribing tool) PLUS a DVD of your choice (Learn the Skills is recommended & best value too!)
3) Artset = 16 waxes, 40 x A6, 20 x A5, 10 x A4 white card, 24 sheets A5 coloured card, 32 page guide, metal scribing tool. * you need to have an iron already
4) Iron - click to buy the iron if you want just that tool.
5) Stylus - a low heat graphics tool (more below)
|
|
|
setting up your work area
You will need a table top area, some protective covering (paper is good) then a pad or sheets of disposable paper to go directly under the painting card as you work.
The iron goes on the working hand side (right or left hand??) with the waxes on the other side, some boxed tissue paper for cleaning & polishing the wax artwork. |
|
|
initial abstract work
'Don't overmix' he said.
'Just use 2 or 3 colours together at the start and try to harmonize.'
'Move lightly with the iron & explore different movements & lifts'
'Stay on the postcard sized encaustic painting card at the start'
'Remember, you can always change things - if you really choose to' Watch it on video - abstract lesson 1
|
|
|
simple landscape work
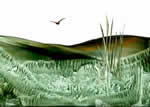
Four simple effects from use of the iron can be combined to create the illusion of landscape. All painting of realism is an illusion. Let your imagination find the landscape flowing through the wax colours. Sage green or Olive green are the ones to try for this, with a little Yellow brown as well.
Watch a video of simple iron landscapes - lesson 2 landscape
|
|
|
using rubber stamps (or clip art)
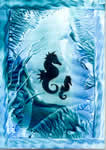
Silhouettes are a very effective and easy way to give a central subject to your cards in encaustic. Underwater scenes, fairy lands, natural landscape and fantasy worlds. All can be encouraged into believability with the help of some good rubber stamps. Rubber or clear polymer both provide good silhouette results. Clip art, printed out through an INK JET (not laser) onto the encaustic card can give pleasing results too and opens another collage type potential up.
|
|
|
developing landscapes a bit
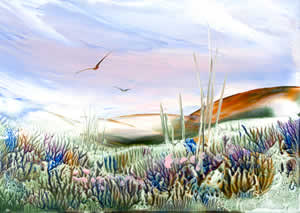
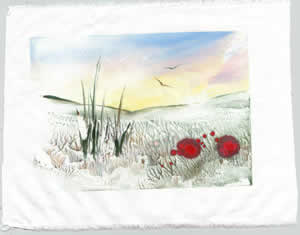
In no time at all you could be using lots of white wax with a small addition of sky colouring, maybe blue and pink. That makes the top half, the sky. Then add on the simple landscape shown just up this page, and you have a full iron made landscape. Try to harmonise the landscape to subtly reflect the sky colouring & see the whole image take on an overall harmony. |
|
|
printing wax images onto fabric
'Can I work on fabric with this?'
Well, yes, in a way.
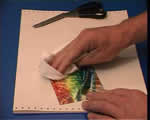
the wax artwork needs to be turned face down onto the fabric, and then ironed over from the back to re-melt the wax & create the transfer (in reverse). Good for hand &machine embroidery, collage & any "wall" or non-contact projects. Wax can soften from body heat & so is not really recommended for clothing or furnishings. |
|
|
protecting cards from scratching
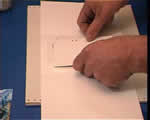
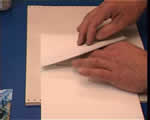
The fragile surface of the wax artwork can be scratched or retain finger marks if over-handled. So for greetings cards and display work that gets regularly handled the acrylic wax sealer is a good protective product to use. Simply polish the wax artwork, brush on the sealer with a wide soft brush, leave to dry, then mount into the window cards. Long term artwork is better left unsealed though. |
|
|
Make aperture cards with encaustic art
Making a card is one thing, but polish it up and present it nicely to friends and family, then it will add another dimension to the pleasure and enjoyment. Your creation & then the sharing of what it contains for others as they look into it.
What can be more satisfying than seeing your expression appreciated through the eyes of others. And then ....
... you might find you have just been asked if you sell them?
Well, why not?
|
|
|
the encaustic stylus - a low heat graphics tool for wax
The stylus is a low-heat tool for graphics in molten wax colour. There are a small range of interchangeable tips - drawing, wire brush, round, micro & mini heads too. If you want to have total control or add graphical detail - lines, spots, shading - then this is the ideal tool to use. |
|
BOOKS.
GUIDENCE.
WRITTEN
HELP.
|
BOOKS TO HELP YOU GET STARTED
There are several written & illustrated products that can help you get a faster uunderstanding & enable to to progress more quickly.
The QUICK GUIDE is a 32 page A5 sized full colour booklet.
It introduces pretty muvch the full encaustic art range and gives step by step pages for abstract, landscape, stamping, etc as well as glimpses into hotplate dn hot air tools. It is contained in the encaustic ARTSET but ca also be bought separately.
|
|
|
There are 2 books specifically related to the encaustic art wax range.
The first, Encaustic Art ~ How to paint with wax, is a 64 page guide to get you started & deals with the basics of using the iron, stylus adn simple beginning approaches - a good basis.
The second is the 96 page Encaustic Art ~ The Project Book, which looks into further areas of possibility. Different support materials, hot air blowing, collaging & a number of other things.
Note: Neither of these books are aimed at Gallery artists or anyone using waxes that contain resins. Both books relate specifically to encaustic art waxes & focus on Hobby art.
|
|
|
A COUPLE OF DVD PROGRAMS THAT MIGHT HELP
WATCH A VIDEO OF DVD SNIPPETS
Quick Cards (1 hour) is a DVD about making abstract greetings cards & was produced to help give confidence & bold use of the iron to create marks of different types.
Learn the Skills (90 minutes) contains about 20 modules designed to enable the basic skills to be learned through creation of a set of simple postcard sized images - RECOMMENDED
|
|
|
visit the iron & stylus 'Learn the Skills' index page
Browse through this section of titles that encourage beginners to explore & practise the basic iron skills through a set of small image subjects: abstract, landscape, fantasy castles and more .... |
|
|
|