


 |
 |
 |
 |
 |
DEVELOPMENT |
ONLINE
PROJECTS |
|||||
| Hotplate : Basics for use with encaustic wax | |
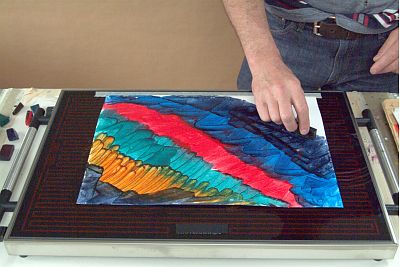 |
There are scores of ways in which to use the hotplate as an under-heating bed for produciton of encaustic artwork. This page introduces some of these approaches, but look through the hotpate index for many more pages and ideas. |
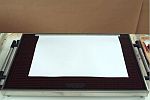 |
This abstract starts with a blank A3 sized encaustic art painting card. A piece of masking tape is used to secure the lower edge of the paper to the hotplate (paper tape with low tack self adhesive used in home decoration). This adhesive tape holds the painting card steady in position during the working process. |
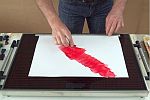 |
The hotplate is usually set on the dial with 7 or 8 uppermost on the thermostat. This provides a temperature that should not buckle the card but will cause a swift melting of the wax colours as they are applied. Here a red wax is crayoned on, back and forth, quite speedily but not rushed. |
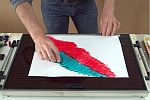 |
Another band of colour is melted on adjacent to the first. This time No.8 blue green. Don't be stingy but allow enough wax to melt off so that there is a bit of liquid quality visible in the deposit. This will enable the colours to be worked with the various tools later if desired. |
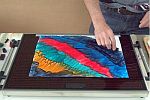 |
Fill the complete surface of the card with the wax colours, remembering that each adjacent colour will mingle when worked, so harmonious colours will blend to pleasing new combined hues whilst opposing colours will create dark outcomes when mixed together. |
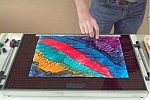 |
The encaustic art wax block colours can be used straight from the application block, like a melting crayon, to make the marks that will remain as the eventual artwork effect. Many and various marks are possible this way, from stuttering jolting staccato movements to wider side to side Z shapes or swirling lines that flow in circular sweeps or spirals,etc. Cris- crossing lines create great depth very quickly. |
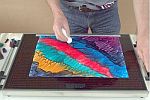 |
One of the cheapest, most convenient and simplest tools is a piece of tissue crumpled into an easy to hold pad. It can be made into a finer pointed form or a rougher irregular shape. |
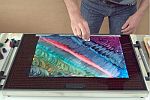 |
Whatever your choice, it is used to gently rub through the wax forming lines of whichever shape you choose to create. Alternatively it can be lifted on and off the molten colour, hopping along across the artwork leaving a trail of interesting marks and patterns. Areas or bands can be wiped almost clean, then fresh wax colour introduced as well. |
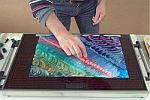 |
The interesting forms are exciting to explore. Even just using these 2 methods of direct wax block application and tissue rub and dab tooling, all sorts of abstract or landscape outcomes can arise. |
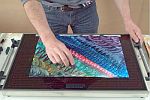 |
So take time to experiment with these basic approaches and you will soon understand how powerful they can be. And sometimes it is nice to wax or wipe out a wide and perhaps irregular border to showcase the best part of your random abstract creation. There are so many opportunities to discover how the wax colours mix, how effects can so easily be formed, how patterns can develop into complex works, on and on into realms of the unimagined. |
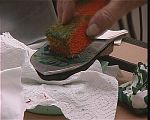 |
Another basic technique is to use the hotplate or the upturned iron (mini hotplate) as a mixing source palette for loading sponges, tissue, brushes, palette knifes and so forth. Either work on a free area of the hotplate or employ the iron (which is small and easy to clean off). |
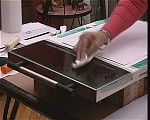 |
Talking of cleaning, the hotplate is easy to clean - just use tissue to wipe off the dirtied glass area until no further colour shows on the fresh tissue piece. To help achieve this in the fastest way do a rough wipe clean first, then add some clear wax to the area being cleaned and then with fresh tissue wash and wipe the residual dirt off. Obviously the hotplate needs to be warm to enable this, so do a clean up every time you finish using the equipment. |
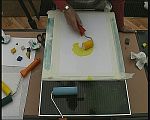 |
The encaustic art A2+ Ultimate Hotplate has enough space to allow quite larger work and an area for loading your sponge rollers. The rollers can safely be left lying on the heated surface (but remove when you switch off or they will stick to the glass!) Crayon the colour onto the glass area first, then pass the roller back and forth across this to load it evenly, lifting off every now and then. |
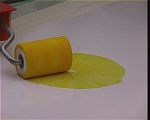 |
Clean colour must come from a clean and colour specific roller. Here a small 50mm (2") decorator's sponge roller is used to create a circle onto a fresh painting card that is taped down onto the hotplate.
|
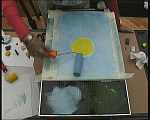 |
Another roller carrying blue wax is then used to circumnavigate the original yellow, producing a yellow disk in a blue background - simple sun in sky exercise. You can see where the blue wax is being sourced by the roller from the hotplate palette loading area. |
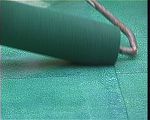 |
Using a roller at this angle enables an edging line to be formed. This can be directed in a straight line or curved this way or that to form non-straight lines. It is worth practicing this line making. Once a background colour is made this technique enables other colours to be added without obliterating the original base colouring. |
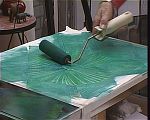 |
The line making edge of the roller is enclosing a set of pattern marks in this example. The outer circular movement is simply "over-writing" the unwanted ends of the inner circular fanned shapes. |
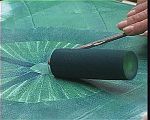 |
Now, with a fresh loading of slightly darker colour the roller is carefully positioned with the inner edge at eh outside of the central disk, then the roller is placed down so the more of its surface contacts the work area. The result is a darker mark that you can see opposite and at 90 degrees to the one now being created in the image. |
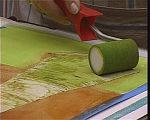 |
Small rollers are useful for working inside areas too. Here the glass vase being painted has had all it's internal colour removed. Now the small roller is re-applying a colouring similar to the background - such as one would see through a water filled glass vase. More on rollers with Elisabeth Van Uden here |
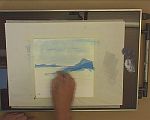 |
Another often used method for hotplate work is to use standard
water colour paper - usually 200 or 300gms thickness (170lb weight). Of
course the encaustic wax colours now become absorbed into the paper as
soon as it is worked, but with a little forethought about applying the
lighter colours first this is not a problem. In this example a cotton bud
(often used in beauty and make-up) is used. It is loaded with molten wax
then rubbed like a felt tip pen to deposit it's colour. A very useful tools
indeed! More on this water colour paper work here |
 |
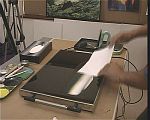
Finally, on this page, one more common method of colour application. This time though the wax is melted directly onto the hotplate in bands that mingle where they meet. The molten liquid wax is then ready to use. A card is settled down carefully into the pool of colour, eliminating air bubbles by slight vigorous shaking as it is embedded. |
 |
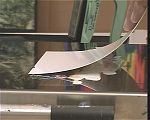
Then with a swift light upward sweep, the card is dragged through and then up out of the wax colour. The resultant coating is an effect unachievable in any other way. More on this drag-through wax coating approach here |
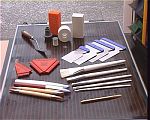 |
To find out more about some of the variety of tools useful for hotplate work go to the Tools page. |
|