DEVELOPMENT
ONLINE
PROJECTS
|
|
|
|
|
DEVELOPMENT |
ONLINE
PROJECTS |
|||||
|
||||
| Recipes for Making Encaustic Wax Medium | ||||
Introduction |
Cold Wax Paste |
|||
 |
Encaustic paint needs to contain wax & colour. The quality of these
components & the
way in which ingredients interact defines the final character & behavior
of the paint. Heat is the solvent for the encaustic medium on this site,
so no evaporating solvents are needed nor discussed here. NOTE: In antiquity it is likely that cold wax pastes were used as well as heated wax colours.. |
|||
 |
This section describes some modern "home studio" ways to melt and make encaustic medium using domestic hardware or currently available heated tools. If a bulk amount of medium is made first then it is easy to remelt and
add colours to suit your needs later. |
|||
| The simplest encaustic paint could be a basic mixture of beeswax and some pigment. However, there are many other types of waxes, each with their own unique heat curve and character. There are also resins that can be mixed with waxes to alter final working qualities of hardness, melting point and flexibility. Pigments (and dyes) offer a multitude of qualities apart from the colour they imbue. The particle size can change the flow character quite dramatically for some application methods. There are many possibilities in formulation. Up to Index |
MAIN WAXES |
|
|||||||
One"classic" recipe
for making your own encaustic wax is to melt together 85% beeswax with
15% damar resin. This will result
in a strong and quite tough wax medium into which you can gently mill /
blend your chosen pigments. However, there are many waxes available and
different blend of formulation will yield many varieties of character in
the encaustic medium. It is not a fixed idea. |
||||||||
 |
In essence making a heat soluble wax paint is simply a matter of melting together the formulation's ingredients in the right proportions and at a temperature that effects the mixing, but does not exceed the safe zone in which the ingredients remain at their best. Excess heat will damage some materials and cause dangers of fuming and potentially even fire. Controlled heat is vital and sensible ventilation is also a firm requirement. | |||||||
 |
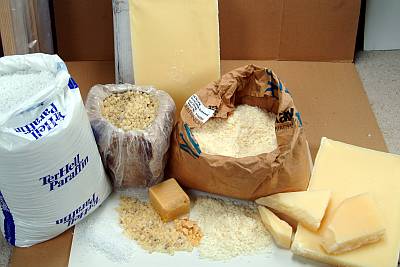
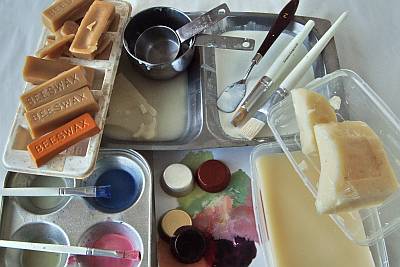
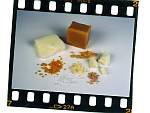
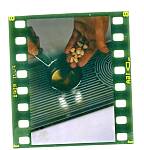
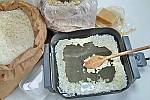
Here is a simple small desktop mix for one colour. A hotplate is the heat source and the working container is a stainless steel measuring cup - like a small saucepan. Ingredients: Beeswax, carnauba, damar resin, red pigment. |
|||||||
 |
This begins to melt and the smaller amount of carnauba is added. | |||||||
 |
Once all that is molten the damar is also added and sat back on the hotplate to melt. | |||||||
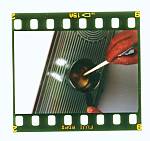 |
Stir all the molten ingredients together ... | |||||||
 |
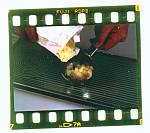
... then add an amount of pigment and stir this into the molten wax. | |||||||
 |
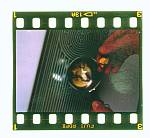
Pour it out into a mold and leave to cool. | |||||||
 Up to Index |
De-mold the now cold an set wax colour piece and you have some encaustic paint ready to use. But let's look at the whole process in a little more detail in the next part of this page where a "Skillet Batch" is made. |
|||||||
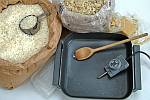 |
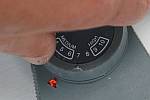
This skillet is
an electrically heated pan with a built in thermostat controlling the maximum
temperature : imperative to avoid any over-heating. Ingredients in this recipe are roughly measured in the cup volumes as: * 6 x refined beeswax * 1 x damar resin with a little carnauba included in the cup too |
|||||||
 |
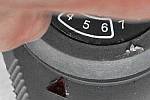
First plug in the skillet and set the temperature to a medium to get it hot quickly. | |||||||
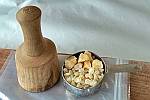 |
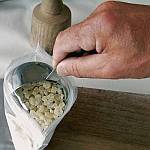
Measure out the cup of damar resin crystals. Here we added a little bit of carnauba wax into this cup to comply with our chosen recipe. The carnauba is brittle and melts around 80C, similar to the damar. However, it is a natural plant wax that offers a very high polish shine, so can add a little of that quality into the mixture. It also smells a lot better than damar resin. The wooden mallet is to crush this stuff into a more powdery form. | |||||||
 |
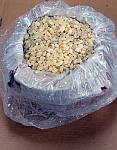
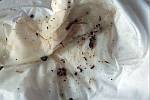
Place the cup full of damar / carnauba into a double plastic bag, ready for the crushing to be done. This process enables the damar to melt faster. The plastic bags are to constrain the materials whilst they are being smashed into finer pieces with the mallet. Some damage will occur to the plastic bags as the sharp crystals pierce the plastic. |
|||||||
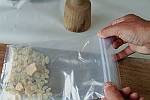 |
So seal the bag, ready to crush ... | |||||||
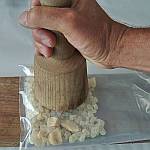 |
... then find a solid under board - here we used a piece of flat scrap timber plank ... ... but wait, don't use the mallet yet or greater damage will occur to the plastic and crystals or dust might scatter ... |
|||||||
 |
... so we used an old tee-shirt as a buffer to soften the impact and contain any dust that might escape.
Check the progress of the crushing every few strokes ... |
|||||||
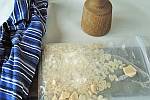 |
... then when you are happy with the state of the damar / carnauba particles stop and retain the ingredient until it is time to add it to the molten wax. | |||||||
 |
Notice how the plastic bag has been damaged?
|
|||||||
 |
But the large hard crystals are now far smaller and will melt more quickly into the final wax medium. | |||||||
 |
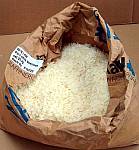
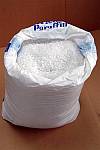
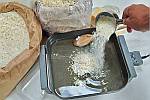
Beeswax can be natural (raw) or refined, where the impurities have been removed. We are using refined white beeswax bought in bulk sack quantity in pellet form. This is easy to handle and easy to measure. The skillet is warming up now, so the beeswax can be added. |
|||||||
 |
We used 6 measures of beeswax and poured them straight into the skillet. Beeswax melts at around 62C (about 145F). Refining does not alter this melt point. |
|||||||
 |
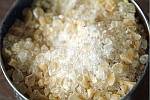
In the next few minutes the beeswax melted. Stirring was not strictly necessary but it did speed up the process a bit. | |||||||
 |
Now the crushed damar and carnauba measure is added. Notice the slight dust (click on thumb for a bigger image). Protect yourself with a mask if you are exposing your breathing to any dusty conditions. Some materials, especially some pigments, can be dangerous, so err on the side of caution. |
|||||||
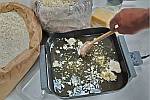 |
These harder materials also have a higher melt point at around 80C, so stirring help to mix them into the beeswax. They can take a while to melt. | |||||||
 |
Notice how the damar is now a syrupy consistency. It is not easily melting into the liquid beeswax because the skillet temperature is just a little on the low side. | |||||||
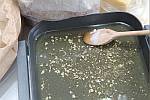 |
The damar and carnauba need things a little hotter to turn into their liquid forms. | |||||||
 |
So up the temperature a bit, but not too much. Better to take a while longer for things to melt than force the ingredients through too high a temperature. If things get too hot fumes will rise from the mixture. |
|||||||
 |
As the temperature rises so the stubborn crystal shards melt into the liquid mixture. | |||||||
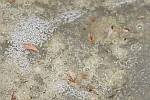 |
All those bits of woody looking stuff are from the damar resin that we used. It is a natural tree resin and this batch turned out to be quite polluted with small woody dross. | |||||||
 |
Once everything is molten check that the temperature is as low as will hold the liquid form of this wax medium. | |||||||
 |
Notice now how the syrupy damar has become liquefied and fluid. | |||||||
 |
Stir all the ingredients together so that they are thoroughly blended. | |||||||
 |
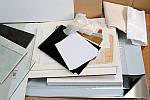
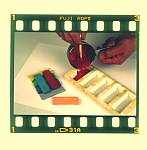
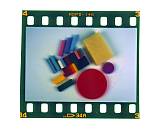
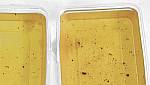
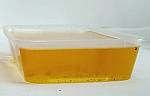
The encaustic wax medium is now ready to be poured into the final molds. These molds (on left) are actually plastic food containers used for carry out (take away) hot foods. They are designed to withstand high domestic temperatures and are an ideal mold for larger blocks of encaustic medium, especially as they come with fitting lids that keep dust off during storage. |
|||||||
 |
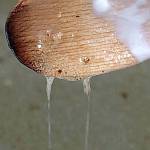
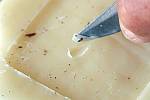
Carefully pour out the molten wax into the standing containers. Some wax may dribble onto the surface, so ensure that you have protected that with some disposable papers before you start. The wax will shrink very slightly as it cools, so fill the containers to a reasonable level. |
|||||||
 |
Pour the wax out carefully so that any dross or rubbish that has been liberated during the melting process remains at the bottom of the skillet. Of course, if there is a lot of impurity in any of the ingredients it will be difficult not to have some enter your molds. |
|||||||
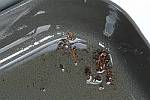 |
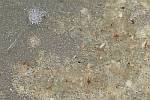
Here is the unwanted dirt that came from the impure damar resin. | |||||||
 |
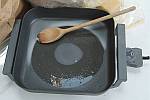
Clean the skillet out whilst it is still warm using disposable tissue. | |||||||
 |
The dirty tissues can then be thrown away and the skillet is ready for another day. | |||||||
 |
The dirt is visible at the bottom of the mold. You may find that your ingredients are pure and this issue does not arise - that is the best way!
|
|||||||
 |
But if there are impurities then this is a way to deal with them that normally work out well. Notice that, just as in the skillet, the dirt has sunk to the bottom. |
|||||||
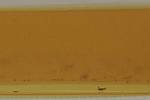 |
So in effect it is only the bottom layer of wax that is holding these impurities. | |||||||
 |
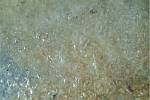
As the wax cools it begins to congeal and cloud back to its solid colouration. This is the base colour of your new encaustic medium. If we had used natural beeswax then perhaps the overall colour would have been more yellowish. Once the wax is congealed it can speed up the cooling up to place the molds by a cool airstream like a window sill, tilting the bottom up so air can get all around. |
|||||||
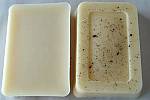 |
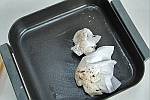
When totally cooled the wax should be quite easy to remove from the molds. This shows that the adhesion to shiny plastics is poor! The top is perfectly clean encaustic wax medium, but the bottom surface is contaminated with all the woody rubbish from the impure damar crystals. |
|||||||
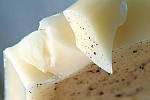 |
Breaking off a piece continues to show that the contamination problem only exists in the very bottom level of the medium block. This can easily be dealt with now. |
|||||||
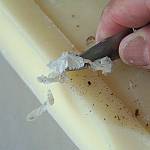 |
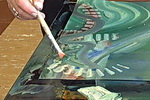
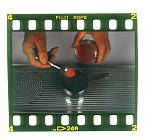
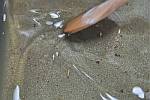
Use a knife blade to gently scrape off the thing dirty layer. | |||||||
 |
Pick out any slightly more embedded or larger pieces with the knife tip. | |||||||
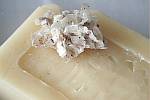 |
After this scraping has been done all over the base the dirty wax shavings can be discarded. In reality this is a very small portion of the wax that has been made in this batch. | |||||||
 |
Without melting, it can be difficult to cut the thick encaustic wax medium which is now a tougher product than the original beeswax. But a sharp hit with the mallet will do the trick. However, remember the tee-shirt used when crushing the damar. This is laid over the wax before striking with the mallet to save bits flying all over the room! |
|||||||
 |
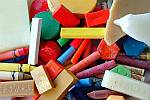
Then the wax breaks into pieces that can be used to make small amounts of differing colours etc. | |||||||
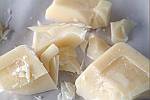 |
Finally, the natural state of our encaustic wax medium is clear. Colour, hardness, melt-point, flexibility, smell, polishing qualities and so on all become apparent. Each recipe you develop can bring different qualities to your encaustic medium. It can be remelted at any future time to add pigment. |
|||||||
| Next, find out about Adding Colour | ||||||||
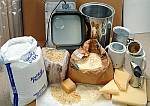
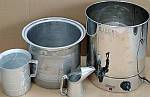
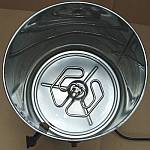
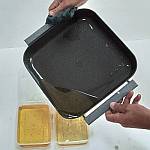
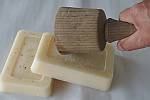
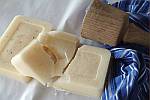
Bigger batches can be achieved using commercial double boilers, often used for heating water in catering situations. These can have internal fitting containers (second from left) that are protected from overheating by the surrounding water in which it is immersed. More about this on the Equipment page
* Just one
thing; it is impossible to get the cold set encaustic medium out! The process is exactly the same as in the skillet batch above, except that quantities can be increased. This water jacket double boiler is the safest way to heat wax as it is impossible for it to become dangerously hot - the water limits the achievable temperature range to within safe levels. |
||||||||
SOME BASIC RECIPES TO START MAKING ENCAUSTIC MEDIUMS
|
||||||||
| Ancient Approaches | ||||||||
Beeswax
& Damar Some people prefer to add Carnauba wax (a natural plant leaf product) to the beeswax in place of the damar. This produces a wax that will polish well but is more brittle than the damar formula. Carnauba wax melts at around 80 degrees Celsius and is brittle. It has the effect of helping to raise the melting point of beeswax (around 62 degrees Celsius) to a higher level - a desirable improvement for a wax paint medium. Carnauba wax also polishes to a high sheen. Recipes therefore vary, but a combination of bleached (refined) beeswax, damar resin and / or carnauba wax seems to be the most common mix. Some people add micro crystalline waxes as well. These can be obtained at various melt points and also varying hardness, so the character of a resultant wax can be natured toward a more specific set of qualities. The process is easiest if some of the beeswax is first melted, usually in a metal container either over a very controlled heat source (hotplate) or a double boiler where the water in the central space avoids overheating past its own boiling point (100C). An open flame is not advisable. Electric cooking rings are able to get very hot, too hot, so again, unless you wish to risk overheating, smoking and even flammable dangers then stay with low heat and heat limited options. Once the beeswax is molten then the damar resin crystals
can be added, but it is best to make these as small as possible by crushing
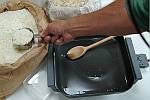
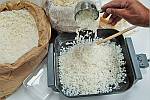
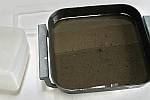
first. Colouring options are really to use dry pigment or pigments already in oil (oil paints). The latter will introduce some oil into the final encaustic wax blend, so in pure encaustic this is not something seen as desirable. It is not "wrong" but does seem to defeat the primary idea of using heat as a solvent. Oil will also soften the final wax to some degree, even if that is a very slight affect it is still involving another medium type unnecessarily. To blend in the pigment for production a useful volume of wax paint some molten encaustic wax medium needs to be melted in a heated metal container. If the container has a flat bottom then it makes it easier to mill in the dry pigment carefully and a little at a time. For instance, on a hotplate a flat bottomed baking tin can be used to hold the molten wax, then dry pigment that has been milled as fine as possible is added and stirred in. A large flat domestic cooking pallet knife is a good tool to mash the pigment and wax together on the flat bottom of the baking tin, using strokes that press down and spread sideways, a bit like spreading butter onto bread. This will ensure that al the particles in the pigment get "wetted" and become contacted by the molten wax. The better this process is done then the more even the consistency of your final wax paint. The coloured encaustic wax can then be poured out into molds to cool and be used in the future or it can just be used there and then. Small amounts of any colour can be made by melting some medium on a hotplate and then working in a little pigment - even by dabbing the waxed brush head into a pot of dry pigment, then coming back to the hotplate and working it into the wax until it reaches the right consistency. Of course a hotplate is an ideal mixing place that keeps
the wax molten and can also be used to lay your tool on top of so that
they too remain ready warmed for instant use. |
||||||||
Beeswax Paste - colour with oil paint or dry pigment Two methods for the same ingredients are listed below "cold or heated". COLD METHOD (safe and easy)
HEATED METHOD (temperature control and ventilation essential)
|
||||||||
Wax Emulsion Beeswax can also be formed into an emulsion for a cold application liquid medium. Visit the web site of Jeff Bryant for lots of information, recipes, advice and examples of his wax tempera paintings. http://waxeggoil.atspace.com/recipes.html#waxrecipe Up to Index |
||||||||
Ancient encaustic approaches
rediscovered in Rome: |
||||||||
Punic Wax 1 not tested by this site, so please check if you have access to other methods for this process too! |
five gallons of fresh seawater Five days to process the wax with sea water. (Pliny
described the process as boiling beeswax with salt water and potassium
carbonate, and then bleached by the sun, leaving the wax a paste consistency.) You should get a creamy yellow paint. |
|||||||
More about encaustic |
||||||||
Wax dissolves in turpentine, mastic, balsam and oils, but not water or alcohol. It's non-yellowing and forms an emulsion in lyes. The Greeks and Romans stored their pigments in small covered containers and called them "waxes", pigments in wax and mastic. Add a little turpentine with your brush and paint away! These ancients were pretty clever also. They painted with pure melted encaustic wax and pigment too, this was probably the wax Pliny talked about, the punic or eleodoric wax. Three times melted and cured in salt water, when this wax was applied on stone for decoration, it was called "ganosis". Traces of this wax are found on Egyptian sculptures and tombs as far back as 2500 B/C. The early Greeks, before the "Dark Ages", around 500 B/C,
were fond of decorating their statues and the friezes of buildings, and
probably a lot more places that were not so protected from twenty five
hundred years of weather. Traces of wax were found on the Trojan Column
in Rome. Ammonia, NH3, is a compound of nitrogen and hydrogen, a water soluble gas. Ammoniac, a salt and gum found in the Qattara Depression 200 miles East of Memphis, Egypt. Ammoniac is the remains of a long extinct insect that lived in the area. Ammonium, is the Egyptian city founded about 500 B/C, as a shrine to their god Ammon. Ammonium is also NH4, a radical that plays the part of a metal in the compound formed when ammonia reacts with acids, ammonium salts are alkali. Ammonium hydroxide, basic NH4OH is a weak alkali. Carbonate, a salt of carbonic acid, as calcium carbonate or ammonium carbonate, made by mixing the ammonium alkali with carbonic acid. H2C03 is formed when carbon dioxide dissolves in water. Ammonium carbonate or ammonium hydroxide [common ammonia water], can be mixed with white beeswax 1:2 and boiled until the effervescence stops, stir the mix until it's cool. This will be a water soluble wax soap emulsion that will mix with casein, gum, glue, egg, gelatin, turpentine, resin, balsam, shellac or oil. The volatile ammonia alkali dissipates and the soap dries insoluble to water, like it was before you started. Put a cap on the container and it will store for a very long time. Grind your store bought dry pigments into it as you need them. Giotto added a little cherry gum to the mix and the Byzantine's added a little "milk of fig". This is the ancient "cera colla' paint of the Dark Ages, except for the shellac, that was tested right here on Maui, and it worked fine. I attribute the discovery of cera colla to Egypt and their god Ammon not to Byzantium. Potassium carbonate or caustic lye soda, is obtained in the impure form from wood ashes, potash [+IUM], are all the same alkali. It will emulsify wax, but will remain soluble in water, or hygroscopic. |
||||||||
| Up to Index | ||||||||
| GO TO |
|