

 |
 |
 |
 |
 |
DEVELOPMENT |
ONLINE
PROJECTS |
|||||
| Castles with the Encaustic Low-heat Stylus tip ... | |
 |
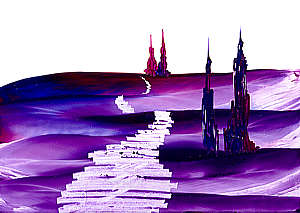
... upright & tall, not wobbly, leaning or top heavy This is how to make castles with the stylus using the drawing tip. |
 |
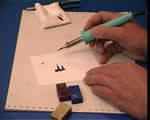
... to make a castle form appear stable you are best to make the base wider than the body of the building. Start by loading the stylus tip with wax colour - here it is Ultra Marine Blue (No.10) and Red Violet (No.12) because they create a nice fantasy purple tint. Remember, when placing a castle into a landscape make the base the same colour as the place where the castle will sit. |
 |
Start by defining the base and how wide it will be. Check that your 'scribble line' is in an upright mode - meaning that
the lines the stylus makes are parallel to the card's edges. When this
is true the castle will stand perfectly straight. |
 |
Start to build the towers and get the general 'weight' and proportions of the building to make visual sense. Reload the stylus with wax as you need and remember that once the base colour has blended into the existing background the castle is then welded into the image and you can alter the colours gradually as you progress up the towers. |
 |
To make the spires you need to pause at the top of the tower structure and refill the stylus tip with a spot of wax. Then in on slick movement place the tip end on the existing tower top and flick the tip vertically, lifting off the tip as it progresses through the flick action. This is the best way to get sharp and clean spires. |
 |
Repeat the action until you have created a castle or other structure that
fits the image you are making. You can add simple windows to the towers
by using the scribing tool and making vertical small slots - don't over
do it though. |
| ... more on this castle image right here |
...and finally...

|
|