DEVELOPMENT
ONLINE
PROJECTS
|
|
|
|
|
DEVELOPMENT |
ONLINE
PROJECTS |
|||||
Hotplate : Elisabeth Van Uden ~ From Hobby to Art |
|||
Elisabeth Van Uden |
 |
 |
CLICK
IMAGES |
 |
 |
 |
 |
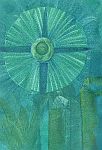
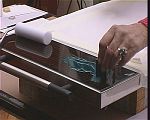
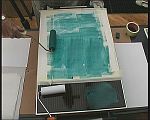
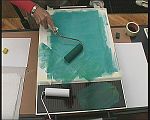
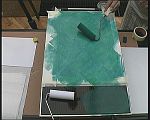
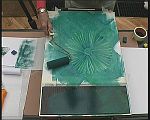
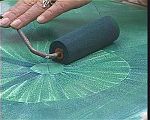
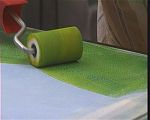
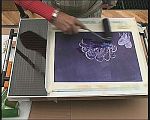
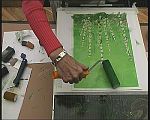
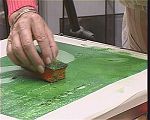
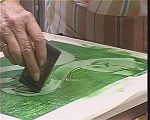
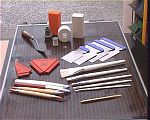
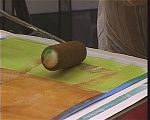
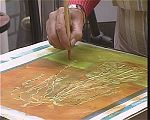
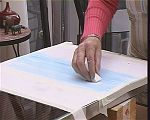
| Roller exercise to practise straight lines, curves & mark making | |
|
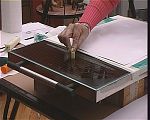
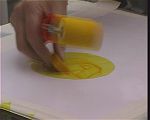
Elisabeth Van Uden created a DVD program called: This first simple example demonstrates coverage of a large card sheet with the roller, then creation of straight lines, curves and pattern marks. All images on this page are shown live on the DVD. |
 |
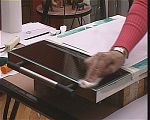
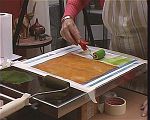
To start off, use paper masking tape to fix the card in place on the hotplate. Do this so that the card sits square to one end of the hotplate, leaving a space on the glass surface for loading the roller at the other end. |
 |
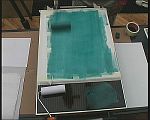
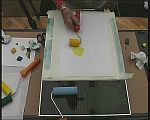
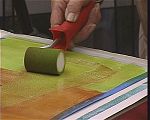
Now crayon on some wax, which will melt upon contact to the heated surface. This is the blue green colour No.8 in the encaustic art wax block range. |
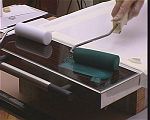 |
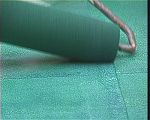
Because another roller is sitting on the loading area this roller is being loaded with a very short stroke. Usually this creates areas of saturation and starvation within the sponge roller (as seen in the application in the next step!). If possible always use the full length of the cross width so that the whole roller surface absorbs the wax colour evenly. |
 |
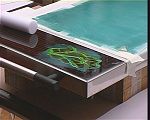
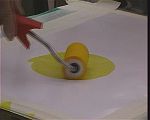
Now it is clear to see, as the roller is passed over the card initially, that the starved area deposits no colour or wax. Fortunately, but rolling for long enough the wax that does transfer to the card is then re-absorbed into the sponge roller, slowly making the wax distribution on the card and over the roller more even. |
 |
So remember, if only a small area is used to load the roller (sometimes the upturned iron is used) then don't just load one side of it. Allow the roller to lift off then place it back onto the loading area with another face of the sponge roller touching. This way you can actually load the roller perfectly on a very short surface. |
 |
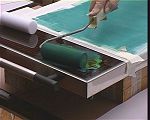
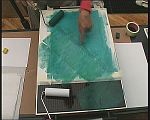
Another way to disperse the heavier applications and fill the weak ones is to roll in an alternative direction. Here at 90 degrees to the original set of strokes. |
 |
With enough light rolling motion the encaustic wax colour becomes evenly distributed and forms a pleasing covering on the card. |
 |
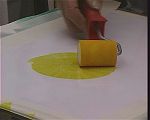
New colour is added to the loading area, this time yellow. |
 |
Then the roller can be "re-charged" with new liquid wax. The yellow will merge with the already present blue green and in fact will probably disappear into the darker colour. However, it may lighten it slightly and it certainly will refresh the liquid quality of the colour, making it far more useful again. |
 |
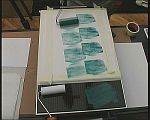
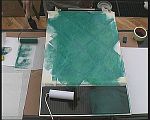
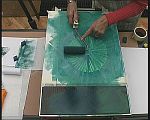
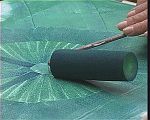
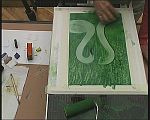
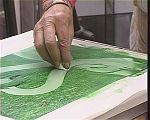
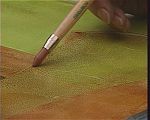
The point of this demonstration is to highlight some of the pitfalls and show some of the simple techniques of rolling on the hotplate. So after coverage the next main thing is straight lining. Here a series of straight rolls on the diagonal angle are being done. |
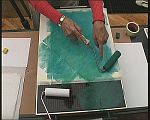 |
In order to get a distinct straight line the roller is pressed down at the handle end and raised slightly off the surface at the free end. The roll is then started ... |
 |
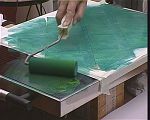
... and continued across the entire work area. A clear line is now formed with a narrow band of the surface wax having been also rolled to the side. |
 |
This can be flattened out again and the line emphasised by turning the roller around then following the newly created line with the free end of the sponge roller. |
 |
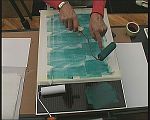
To create a cross hatching the roller must be used at an exaggerated angle so that as little of the roller as possible contacts the surface.
|
 |
Thus the roller creates the cross-angled line but leaves most of those lines it is now running across. Only a small area is erased by the extra roller that unavoidably transits through it. |
 |
... and then you have a cross hatching pattern. |
 |
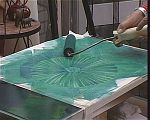
Add some more yellow to again refresh and re-liquify the wax colour on the roller, then explore making a circle of marks. |
 |
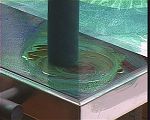
The roller is placed at 12 o'clock on the circle, using a finger on the handle to steady the initial placement. |
 |
Then the roller is pressed down, lifted up at an angle onto the handle edge of the sponge roller, rotated on marks work in a clockwise direction, then placed down flat again to form the next mark. Carry on using this lift, rotate, place routine as you go. |
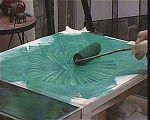 |
Eventually you will have traversed the complete circle, perhaps changing hands and re-placing the roller if you find it easier to do part of the circle from the opposite direction. |
 |
Re-loading again ... |
 |
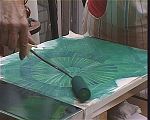
... then rolling round outside the circle of marks to "contain" them an tidy up their outer ends. |
 |
Again, work all the way around ... |
 |
... changing orientation if that is helpful. |
 |
To add distinct marks, similar to the quarter hour places on a clock, just align the roller with the position where the mark is required, then press firmly down and lift off. |
 |
Another repeat of the same process, with the inner roller edge being the initial placing, then the roller is pressed totally into contact again. |
 |
The final mark with he roller just being brought into position before the pressing down occurs. |
 |
The end is useful too and is easy to load with wax colour. |
 |
It had bee "danced" around to form an inner disk area that has tidies up any straggly mark ends. |
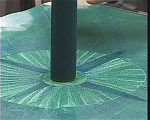 |
One final clean "spot" in the center and the exercise is finished! |
 |
All that is now left to do is cleaning up of the glass palette area. Wipe roughly with some scruffy tissue, then add a bit of clear wax to help wash off any remaining dirt. |
 top index |
Get a clean tissue and wipe it all off again, then it is clean and ready for the next event. |
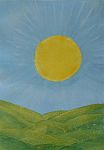
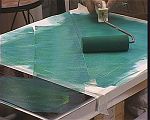
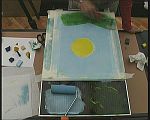
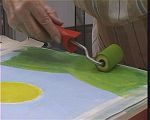
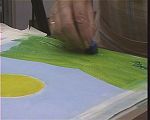
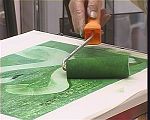
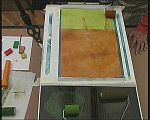
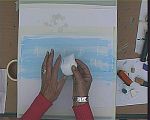
| Roller landscape to practise separation of colours & highlighting | |
|
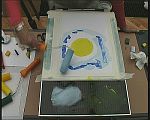
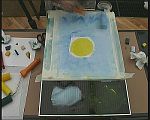
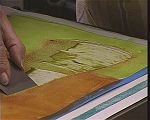
This simple stylised sun in the sky image is another good exercise in roller control. It demands separation of distinct colour areas for the sun and sky, then mingled highlighting for the foreground grassy hills. |
 |
A small 2" (50mm) sponge roller has been fitted to begin the sun area. Yellow wax was melted then the rolled run through it until saturated evenly with the wax colour. |
 |
A tight circular motion delivers the desired round shape for the main feature of a sun. |
 |
A quick and obvious way to get better saturation and stronger colour is to melt the encaustic wax colour directly into the desired space ... |
 |
... then go back in with the roller to smooth it out evenly. |
 |
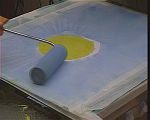
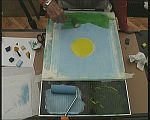
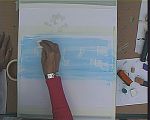
A paste blue block (no.31) has been used to create a new pool of colour on the loading area of the hotplate. The roller is charged up here. Also, with the pastel blue block in hand an initial amount of colour has been melted loosely around the sun, ready to be smoothed out when the rolling begins. This just help speed up the application. |
 |
Some darker wax has also been added direct onto the card, again just to speed up the coverage and create a more intense colouring. |
 |
The larger roller makes short work of covering the blank areas ... |
 |
... and soon the rough shape of colour areas is completed. |
 |
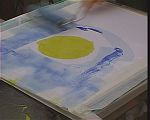
Now the blue roller is brought into a close path around the yellow sun area. As it moves ever closer the white card disappears and the round sun becomes more carefully defined. |
 |
The edge of the roller should just meet into the alternative colour, but avoid any significant overlap as this will blend the colours, in this case it would create a green band between them! |
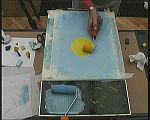 |
Again, the small roller edges the yellow out to touch into the blue until the meeting is completed. |
 |
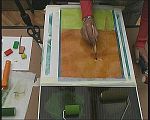
Some dark blue is crayoned into the lower foreground to provide a base for the green hills. |
 |
The small yellow roller is now used to begin formation of the hills. As son as it touches the blue an intermediary green colour is formed and the roller becomes "green". It would be very difficult to get it back to the lighter yellow now, so use new rollers for the lightest colour, then gravitate them down toward darker hues as their life progresses. |
 |
The hill shapes are established ... |
 |
... and then the roller is pressed hard and rolled on top of clean absorbent tissue. This has the effect of draining out much of the wax and colour in the sponge roller. In fact it is making the roller tone lighter by removing pigment. |
 |
Now some yellow wax can be melted and loaded into the roller again. |
 |
It will never be pure yellow again, but it is lighter than the initial green hue, so when rolled it these edges become highlights, like sun reflecting off the curves of the hills. |
 |
Once these are worked in to your satisfaction the final foreground can be darkened to add a little more feeling of depth - dark is close, light or faded is further away. |
 top index |
Some blue is lightly melted into the very bottom of the foreground, then worked over with the small roller to finish the exercise off. |
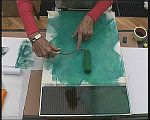
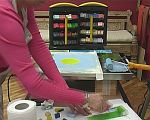
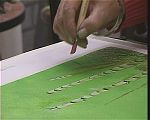
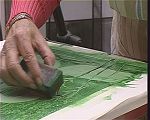
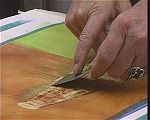
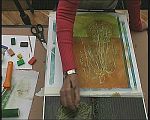
| Japanese knife work | |
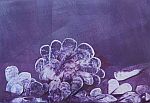 |
Mussels live in clusters on rocks and Elisabeth saw that these would be an ideal subject to portray using the japanese knives. This image demonstrates a straight-forward way of using these versatile tools that can also be loaded with wax from an unturned iron for application to board in collage and impasto work. |
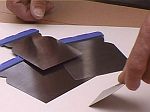 |
The tools themselves are often sold as decorators filling knives. They are very flexible stainless steel oblongs usually with an indented end where a plastic or taped "handle" is fitted. These handles enable the metal to be held even when quite heated. |
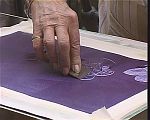 |
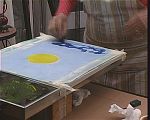
The purple wax background was rollered onto the card first. This is the base into which the knives will work. Elisabeth uses a reasonable pressure as she swirls the flat end of the blade through the wax colour, creating a trail effect that forms the shape of the individual mussel shell. |
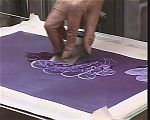 |
A whole series of these marks are created together, each one adding to the cluster that builds into the final image. |
 |
More wax can be added direct from the block ... |
 |
... and rollered in if appropriate. |
 top index |
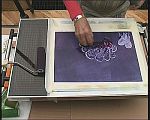
The japanese knife is used again, building the numbers of mussel shapes into a body sufficient to create a balanced final image. Of course, these knives can be placed and lifted off creating oblongs, square shapes, corners and lines. All in all they are a versatile addition to the hotplate toolbox. |
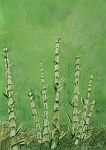
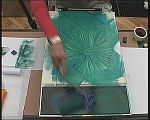
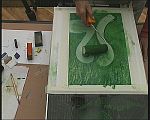
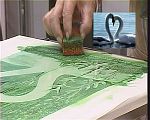
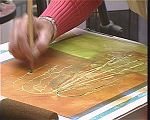
| Bamboo using scrapy wax movers & round sponges | |
|
Bamboo is one of those pants that has dynamic growth. This image displays one way of using the scrapy wax movers and small sponge rounds. Initially the card was rolled over with a green encaustic art wax block. Once the wax coating was in place the definition of the bamboo could begin. |
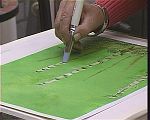 |
One of the large scrapy tools is being used here. First placed, then dragged toward the bottom of the image, a small section of the underlying card is revealed. The process is repeated and another section is added. It is not long before a whole sectional stem is created. |
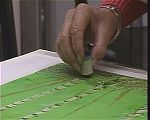 |
As the stem gets closer to the "ground" so the diameter of the stem increases. This calls for a wider rounded tool and a small round white block sponge proves to be ideal for this increase in diameter. It is used in exactly the same process. Place, drag, lift, place drag, lift and so on. |
 |
Of course, for the smaller twiggy pieces of bamboo a lighter finer tip is required. Another size of the rounded scrapy wax mover is employed to good effect, again following the same process of place, drag, lift. |
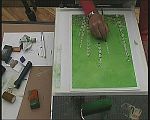 |
The energy form in this image is also a dynamic one, with a set of lines expanding outwards and upwards. These give the final image a feeling of growth and action. |
 |
The scrapy wax movers can be used to collect colour and then deposit it onto the image, again adding shading or strengthen the leaf shoots.. |
 |
Here the small round white block sponge is being used to add leaf shoots to the stems. These are created by making short sideways flicks from out of the stem edges, both to left an d right, slightly upward oriented. |
 |
The orange sponge is quite porous and ideal for foliage effects, so is being used to tidy up and enhance the lower edges of the image. |
 top index |
A final quick light rolling to disperse a couple of small wax splashes. care is taken to avoid rolling over the actual bamboo stem work or this will be weakened or lost again! It is a nice subject and a satisfying process to explore, all the tie developing your skill and understanding of how the tools may be used in many various ways. |
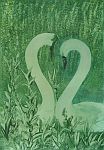
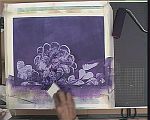
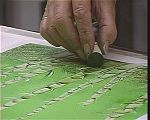
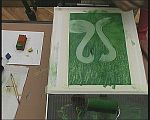
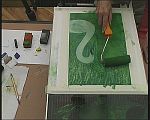
| Swans using white block & sponges | |
|
Swans are an elegant subject to approach and in this piece Elisabeth uses the white block sponge to push wax out from the background, forming the main body of the swans. |
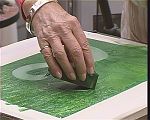 |
The background was rollered on then an orange sponge was used to texture some foliage in the form of weeping willow, where the boughs and branches hang vertically trailing their leaves. Then one swan was formed and we join the process as the second is to be shaped out. |
 |
a sweeping stroke has yielded the neck shape, but Elisabeth is not happy with the flow of this particular stroke, so .... |
 |
... one quick grab brings in the roller and in a few passes the undesired beginning is over-painted and lost for ever.. |
 |
A quick touch up with the orange sponge to blend the foliage streams back into place ... |
|
... and it is time for another go at finding that desired sweeping stroke, one that will respect the form of the swan and provide a reflection of the already created partner. |
 |
This tie the white block has flowed in line with desire, and the main form for the new swan is created. |
 |
The roller is now used to touch up the outer line ... |
 |
... and then using just the handle edge of the roller, it is carefully employed to enhance the inner curve of the swan's neck. |
 |
More white block work to form the main body and wing area ... |
 |
... all the time referencing the rest of the swan's dimension and considering the existing partner bird. |
 |
A piece of tissue is used to clean out the smudged wax in the neck area ... |
 |
... and also the body. |
 |
Now the white block is used, corner only touching, and slid up through the whitened space to portray grasses and foliage growing in the foreground. |
 |
The orange sponge again adds the foliage texturing ... |
 top index |
... and with a few more touches the work is just about finished. |
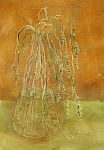
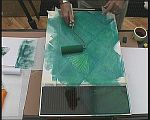
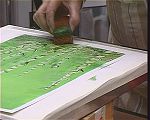
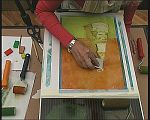
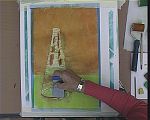
| Glass Vase using many tools | |
|
It takes a lot of experience and skill to paint a glass vessel against any multi coloured background. There are many considerations. It takes an exerted effort to ensure that the glass remains in "front" of the background. It is all too easy to lose the glass into a flat shape imposed upon a surface and dimension disappears. |
 |
A whole selection of tools can be used once your work gets to the stage of painterly subject matter. Effects are largely left behind and controlled expression is pursued more carefully, more time is spent chasing that "just right" feeling and ensuring that the visual definition, depth, perspective and colouration are harmonious to the final work. |
 |
As in the previous work on this page, Elisabeth has taped the card in place, leaving room for the roller loading strip. The piece begins with rollering on a two colour background, on e roller with browns, one with greenish tones. |
 |
A small roller in brown colour is then used to create an initial outline for the vase shape. First one side ... |
 |
... then the other. |
 |
The orifice at the neck is drawn in using a small rubber tipped wax mover. |
 |
The base is again rolled in ... |
 |
... then a light fill of colour is added to emphasise the location of the glass vase. |
 |
The small scrapy rubber tip enhances the outline and further defines it. |
 |
A japanese knife is used to work some of the colour back off the edge line ... |
 |
... and this helps clarify the dimensional form of the glass vase. |
 |
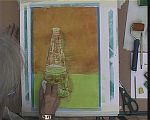
Again, the small green roller is worked over the internal vase area, softening, strengthening, adding and removing, all the time Elisabeth is monitoring the progress, searching for that feeling of satisfaction where the glass achieves that illusion of transparency. |
 |
Tissue is used to clean up excess wax, to emphasise or tone down the colours as necessary. |
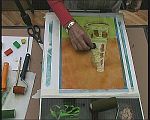 |
More wax is now added. This darker brown solidifies the density of the object ... |
 |
... then Elisabeth can again use the japanese knife, employing it's hard but flexible manner to help define and organise the colours until they are just right. |
 |
A two handed action gives the ultimate control of this simple tool. |
 |
Tissue again helps cope with the adjustments which are becoming finer and finer as the image takes form. |
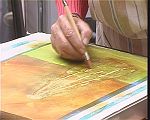 |
NOw the small scrapy wax mover is being used to draw in the stems of the plant forms that are going to inhabit the glass vase. The perspective of the stems entering into the water is carefully observed in reality. The as the painting unfolds correct and visually accurate information can be manifest. Observation is so very important if you want to make representational works! |
 |
As the flower forms arch up out of the vase they then drop again to ward gravity, and a steady hand flows the lines evenly with neither rush nor hesitation. |
 |
Finer details are added. |
 |
Remember that the hotplate palette is used to melt the source colour. The scrapy wax mover can then collect coloured wax and re-apply it to strengthen the lines, shade and so on. |
 top index |
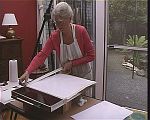
At last, after many movements, many additions and removals, many toning touches and detail adjustments the work is about completed. Elisabeth did this in front of a running film camera and that is quite a pressure to have to work with. No tie for a minute's contemplation, just get on with it please! You can see this in live action accompanied by restful harp music on the "Encaustic Art ~ From Hobby to Art" |
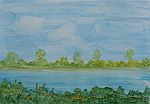
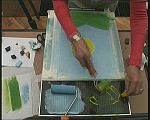
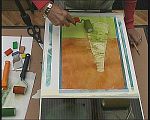
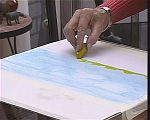
| Landscape - a basic hotplate approach | |
|
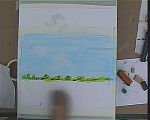
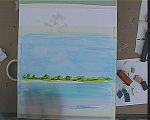
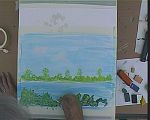
The final work shown on Elisabeth's DVD is this first step to hotplate landscape. You can see more approaches in the hotplate section of this site. Look at John Buckland's approaches and for a couple of water colour paper examples see the section by Michael Bossom too. So onto this way for landscape - fast and satisfying ... |
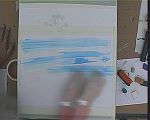 |
Tape on the card as before then crayon melt on some white wax over the top sky area. Add some blue into this, but not too much - the colours are strong. |
 |
Now go back to your white block and melt this again, over working the blue that now resides there. Continue this until the blend of colours has softened somewhat. |
 |
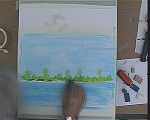
Create a small tissue pad by folding a fresh tissue. Then use this lightly over partial areas of the blue ... |
 |
... to take out some of the wax, making cloud-like softened areas within the sky. |
 |
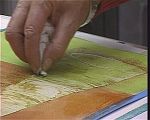
Using a yellow encaustic art wax block add in a line of colour that is going to be the under-colour for the distant tree lined bank of a lake. |
 |
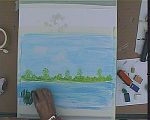
Over-work this with some darker green to build up the tonal qualities and discover a sense of depth beginning to emerge. |
 |
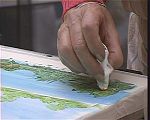
Again melt white encaustic wax in the lower area that is to become water. |
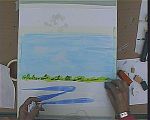 |
The add in some blue ... |
 |
... and work this again with more white, similar to how the sky was created. |
 |
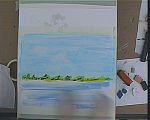
The colour tone can be changed by adding some blue green (No.8) into the mix ... |
 |
... working this very lightly, stroking it with a tissue pad. |
 |
Some darker green strengthens the idea of shadow and a bank on the distant side of the water. |
 |
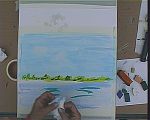
A direct application of wax in the foreground now introduces a darker more imminent foliage. |
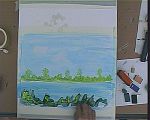 |
This is added to and worked upon ... |
 |
... then tones down with tissue softening ... |
 top index |
... until a final balance is achieved and the image looks both believable and feels comfortable to the creator's eye. Many many thanks to Elisabeth Van Uden for facing the live film camera's and sharing her considerable skills and art in a way that makes these beginnings accessible to anyone who wants to venture into this fascinating world of encaustic art hotplate work. |
| GO TO |
|