


DEVELOPMENT
ONLINE
PROJECTS
|
|
|
|
|
DEVELOPMENT |
ONLINE
PROJECTS |
|||||
| Hotplate
: Exploring Ideas with Michael Bossom Michael's images in the hotplate gallery |
|
 * CLICK ANY IMAGE FOR AN ENLARGEMENT |
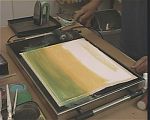
Water colour paper is a great material for use on the hotplate. Its absorbency can be used to advantage in some approaches, especially the creation of shading for depth. These two examples below explain how to use a torn roller, then how to use cotton bud tips as shading tools. Both are shown live on the DVD Exploring Ideas |
| Using a TORN ROLLER for creating irregular horizon shapes | |
 |
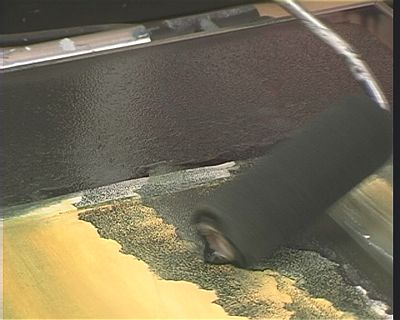
An old and wax encrusted sponge roller does not seem like the obvious choice for a useful painting or creative tool, but it can be exactly that. The roller end will be used to create irregular horizon shapes for a mountain range and foreground rocks. |
 |
Just tear off the end portion of the gunked up roller ... |
 |
... so that you end up with an irregular ragged edge shape. |
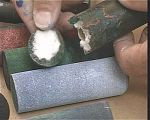 |
Not much wasted, but this makes it into a totally different tool than it previously was and offers some unique individual effects. |
 |
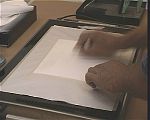
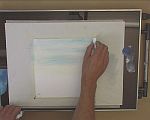
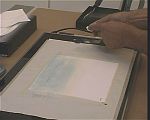
A piece of 300gms (170lb) water colour paper is taped all round, then adhered to the hotplate. An area to the right has been left clear so that the roller can be charged up with wax away from the actual painting surface. A yellow wax block is used direct onto the paper to apply the initial colouring which will saturate the paper. |
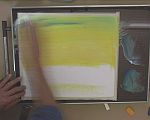 |
A small amount of blue wax is now added into the original yellow ... |
 |
... working down over the top half or so of the sky area. This tones the bright luminosity of the yellow down. |
 |
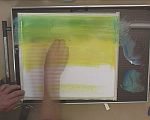
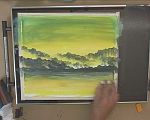
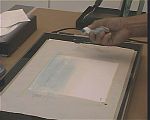
The sky are is now complete and ready for the initial horizon to be introduced with the roller. First the sponge roller has to be loaded or charged with wax colour, so some darker wax is melted on the clear right hand side of the hotplate and then the roller is roller through it ... |
 |
... backwards and forwards until the sponge has warmed and absorbed sufficient molten wax to now re-apply the colour to the painting itself. |
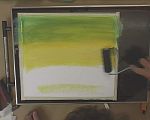 |
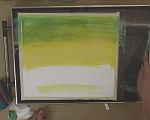
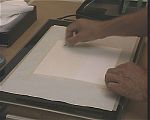
The first stroke is made with the ragged edge pressing firmly onto the paper whilst the handle end of the roller is angled so that it does not contact with the painting surface. |
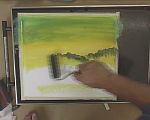 |
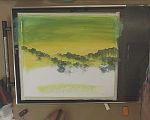
Each stroke yields a new ragged jagged line of dark markings that are now representing the mountain top horizons. |
 |
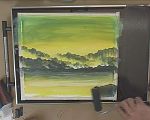
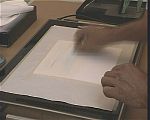
Continue working the series of strokes, sometimes allowing space in between if this feels right to the composition of the piece as it is building up. |
 |
Notice the angle of the roller, held with firm pressure on the ragged end so that a distinct line is formed yet the width of the band mark being created is kept as narrow as possible. |
 |
Re-wax the roller with more dark colour ... |
 |
... and re-apply, creating yet another band and layer of jagged line horizon. The darker tone give rise to the illusion that this part is closer to the viewer than the paler original marks. |
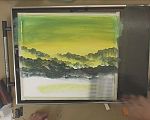 |
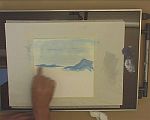
Soon the complete background of mountains and rocky ridges has been built up into a believable depth through the variation of tonal layers (light / dark). |
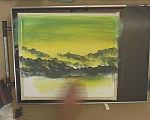 |
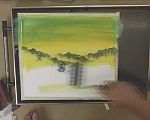
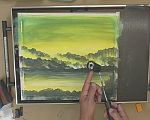
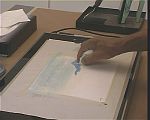
Now to add some water, again using the same yellow wax block to crayon melt direct onto the paper surface until it begins to saturate. |
 |
Some white is also introduced to add to the breakup of tones, indicating reflected light in the water area. |
 |
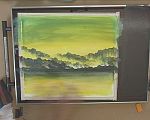
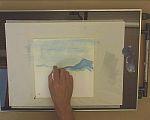
A series of horizontal white marks suggests wave forms ... |
 |
... which get stronger as they get lower (to the front of our image). Again, employ the roller to add in the darker colouration and suddenly the water is held within the page and also pushed backward toward the far away rocky ridges. |
 |
.. and all that rocky jagged detail was just a simple (almost trashed) torn roller end. |
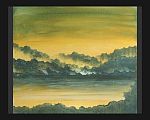 |
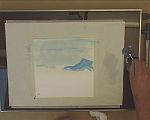
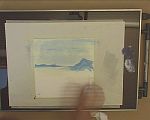
The final form of this simple yet interesting composition that demonstrates the value of tone and the versatile use of the torn roller end. Often illusions are better kept simple! |
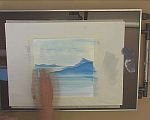
| Using COTTON TIP BUDS for shading & drawing | |
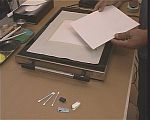 |
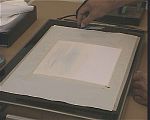
A small square of water colour paper has been taped down around all its edges onto a piece of disposable paper. The purpose here is to ensure that the back of the "artwork" stays clean. The disposable paper is also taped down to hold it in a stable position on the hotplate during working. |
 |
Only 3 coloured waxes will be used in this exercise, designed to illustrate the use of cotton tipped buds for shading, etc. White, pastel blue and dark blue are chosen. |
 |
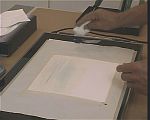
It is important that the white wax block be perfectly clean when used onto the water colour paper. Any absorbent surface will soak in the colour applied, so if any stray dirt or pigment get in there it is hard and sometimes impossible to remove them again. |
 |
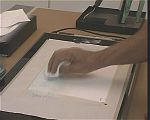
A good way to clean the block is to first melt its face off on the glass hotplate ... |
 |
... then finally on the disposable under-paper before committing to the actual work paper. |
 |
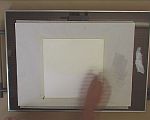
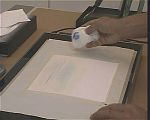
Apply the white liberally across the whole area of what will become the sky, allowing the molten white wax to soak into the paper as you go. |
 |
You can work quite fast in this style ... |
 |
... so the white application is soon completed. |
 |
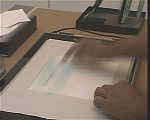
Now the pastel blue is introduced ... |
 |
... but because it was not checked and cleaned, you can see streaks of darker "stray" colour have managed to find their way into the sky area! |
 |
This was not intentional, but as mentioned above, it is very difficult to remove such marking from a light area once it has occurred. |
 |
Some dark blue is now melted onto the hotplate palette area, then a tissue is folded into a rough pad and lightly dabbed into the wax colour. |
 |
The pad is then brought over to the working paper area. The wax is now cold on its surface, but once it re-contacts the sky area it will melt again immediately. |
 |
So now the tissue pad is used to add some darker tones into the sky. |
 |
These are worked in very softly. |
 |
In an effort to blend out the dark streaks some more white is added ... |
 |
... then worked in with a tissue pad again. |
 |
But alas, once these sharply defined streaks are embedded in the absorbent paper it is very difficult to remove them. There's a good lesson there! |
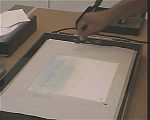 |
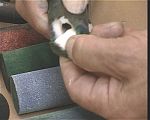
More dark blue is melted onto the palette area ... |
 |
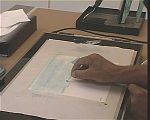
... then a tissue is folded into several thickness's and wrapped around the "working finger".
|
 |
Once it is dipped into the wax colour the tissue becomes ready for application. |
 |
Apply sufficient pressure to melt off the colour being carried by the tissue and travel along slowly, forming the horizon shape of a mountain top as you go. |
 |
Coming in more softly from the other side without re-loading the tissue means that these hills will be paler and appear more distant in the visual illusion of this piece. |
 |
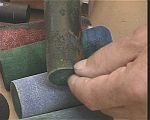
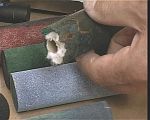
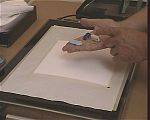
Next a small cotton bud stick (sold in chemists / pharmacy, etc for make-up application, ear cleaning,etc) is loaded with the dark blue wax from the hotplate palette area. |
 |
Now fine control of application means that very small areas can be accurately shaded. |
 |
The cotton tip enables careful and fairly precise deposits of colour to be built up. |
 |
Another layer of landscape depth begins at the right hand edge ... |
 |
... and is worked down across the paper, adding strength to the distance illusion. |
 |
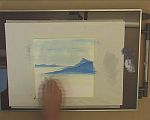
Darkening is an easy as using a shading pencil ... |
 |
... and soon the main features are in place. |
 |
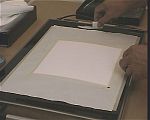
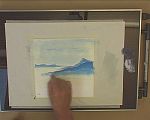
Tie to add some more white with a wax block, direct onto the lower area of the paper. |
 |
Tone this in with the tissue pad that still has some blue wax impregnated in its fibers from the last use. |
 |
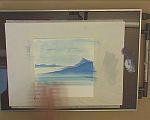
Work a lighter smear across the water area in the more distant left middle area. |
 |
And the water shading is completed for this image. |
 |
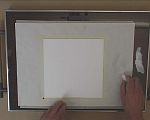
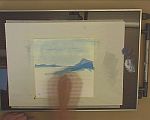
Now use the blue wax block direct onto the absorbent water colour paper and an intense and dark application occurs. |
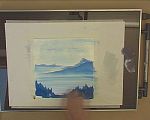 |
Once this has been carried across the entire frontal zone of the foreground the demonstration is complete and the image must rest as it now looks. |
 |
The final piece, a demonstration on the DVD Exploring Ideas Cotton bud tips were also used in this image CLICK HERE |
| GO TO |
|